React Native 开发环境配置
本文假设你是在 macOS 环境下开发 React Native 应用
梯子
知道如何使用梯子访问外网。
编辑 ~/.zshrc 文件,添加网络代理设置 (仅供参考)
# vim ~/.zshrc 或 open -e ~/.zshrc
export http_proxy=http://127.0.0.1:1087
export https_proxy=http://127.0.0.1:1087
export no_proxy=127.0.0.1,localhost,192.168.0.0/16,172.16.0.0/12,10.0.0.0/8  # basic
export no_proxy=cocoapods.org,$no_proxy # dev
Xcode
在安装 Homebrew 之前,先安装 Xcode,Homebrew 中的许多 Formulae 都需要它。
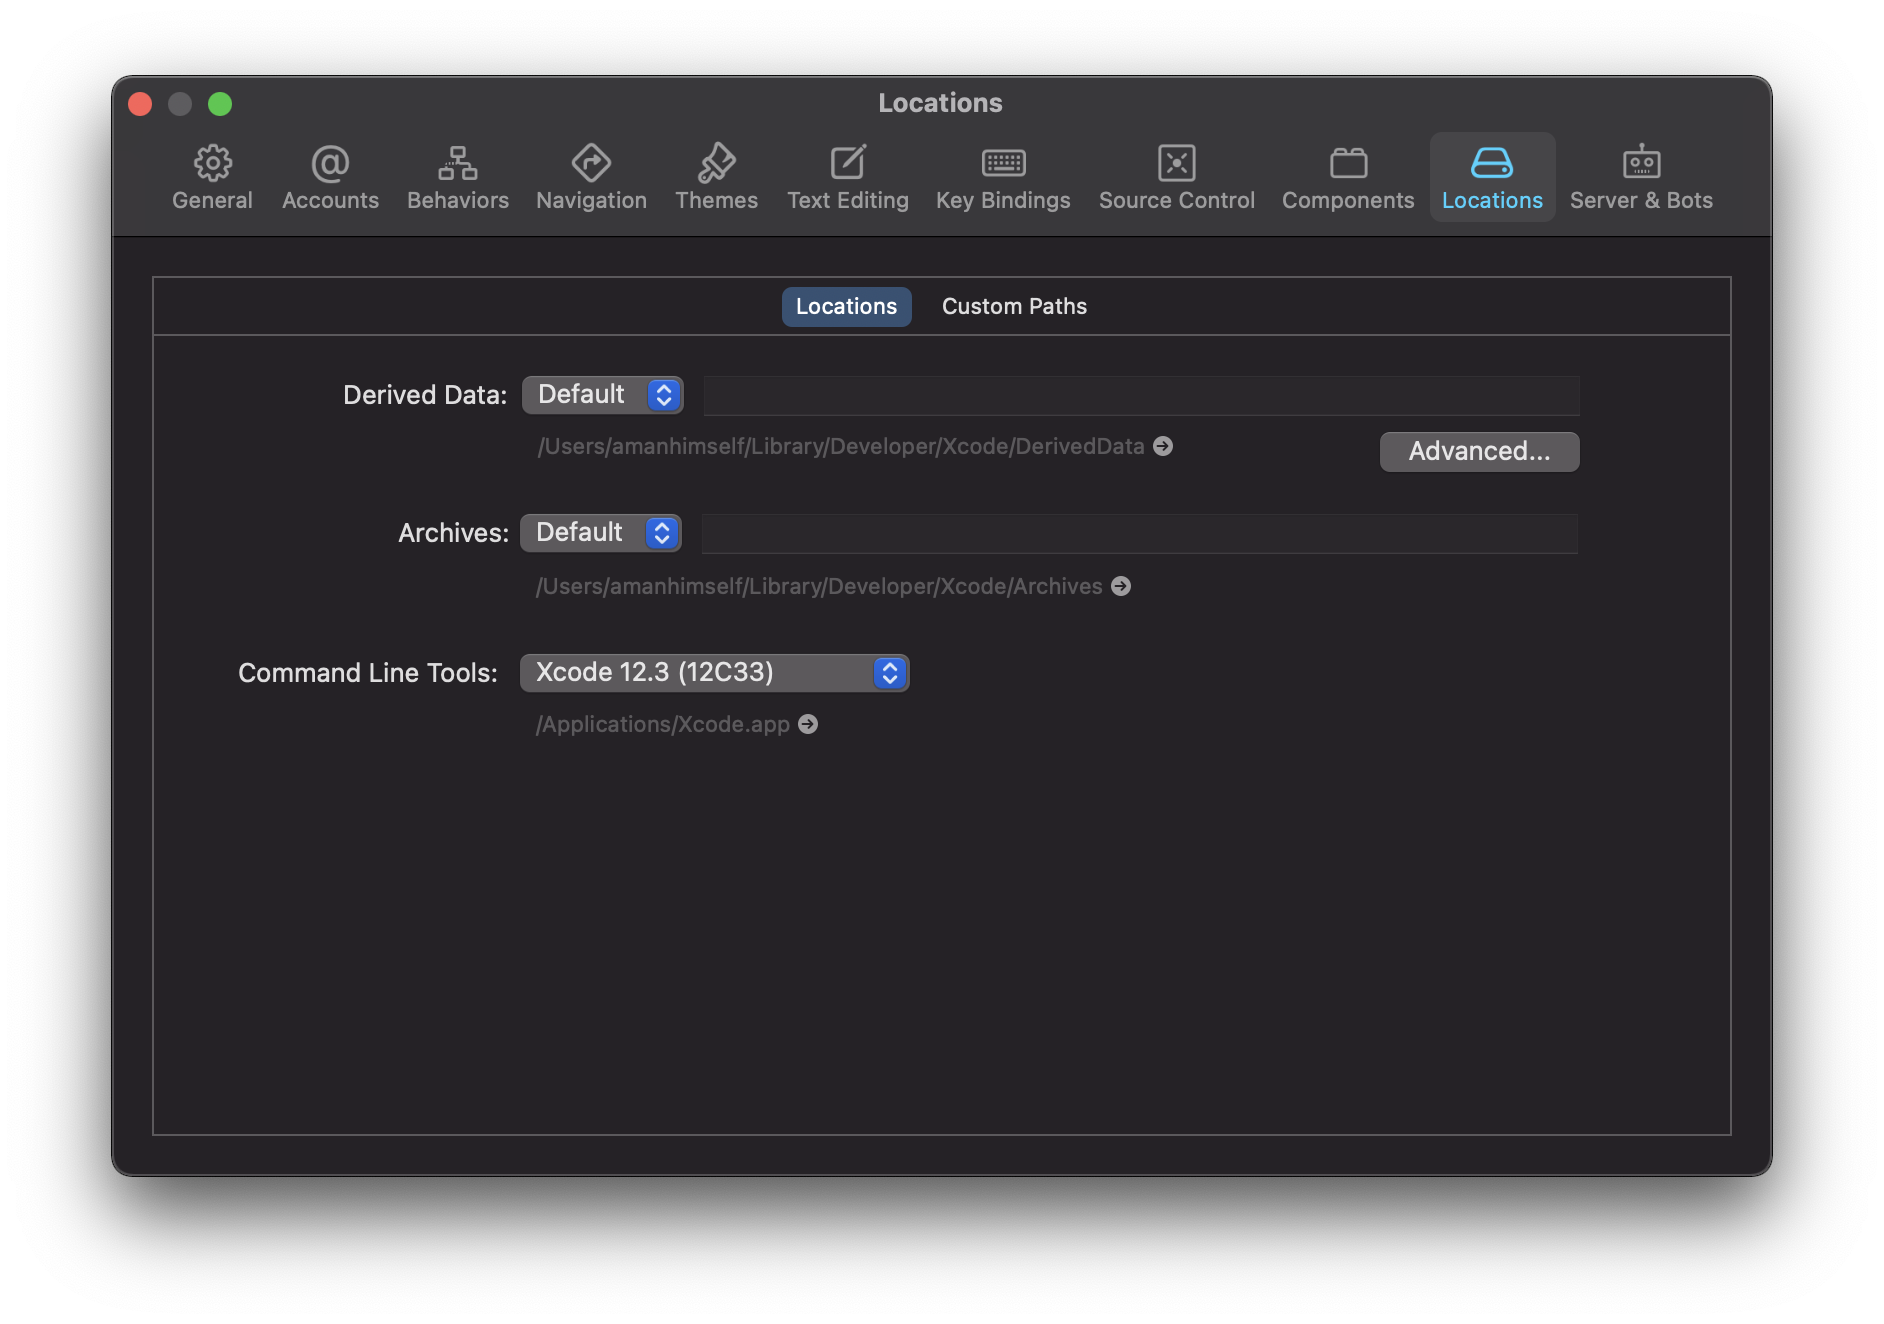
安装后,确保第一次打开它,从菜单栏中,打开 Xcode > Preferences > Locations 并确保命令行工具指向当前的 Xcode 应用程序。
Homebrew
Homebrew 是 Mac OSX 上的软件包管理工具,能在 Mac 中方便的安装软件或者卸载软件,相当于 linux 下的 apt-get、yum 神器;Homebrew 可以在 Mac 上安装一些 OS X 没有的 UNIX 工具,Homebrew 将这些工具统统安装到了 /usr/local/Cellar 目录中,并在 /usr/local/bin 中创建符号链接。
可以通过以下命令来安装 Homebrew:
/bin/bash -c \
  "$(curl -fsSL https://raw.githubusercontent.com/Homebrew/install/HEAD/install.sh)"
Node
Node (Node.js) 是一个基于 Chrome V8 引擎的 JavaScript 运行时。
可以通过 Homebrew 来安装 Node:
brew install node
或者指定版本
brew install node@18
如果是 M1 机器
Soft Link
sudo ln -s $(which node) /usr/local/bin/node
npm 会跟随 Node 一起安装,npm 是 Node 的包管理器。
Yarn
yarn 和 npm 一样,都是 Node 的包管理器。
curl -o- -L https://yarnpkg.com/install.sh | bash
Watchman
Watchman is a tool by Facebook for watching changes in the filesystem. It is highly recommended you install it for better performance.
brew install watchman
Ruby
iOS 的工具链大都基于 ruby,为了避免各种权限问题,我们避免使用系统自带的 ruby,而选择重新安装一个。
brew install ruby
根据提示,将新安装的 ruby 添加到环境变量中。
echo 'export PATH="/opt/homebrew/opt/ruby/bin:$PATH"' >> ~/.zshrc
Bundler 是 Ruby 的包管理器,任何现代 Ruby 发行版都预装了 Bundler。
下面三个被框起来的文件和文件夹,就是配合 Bundler 使用的。
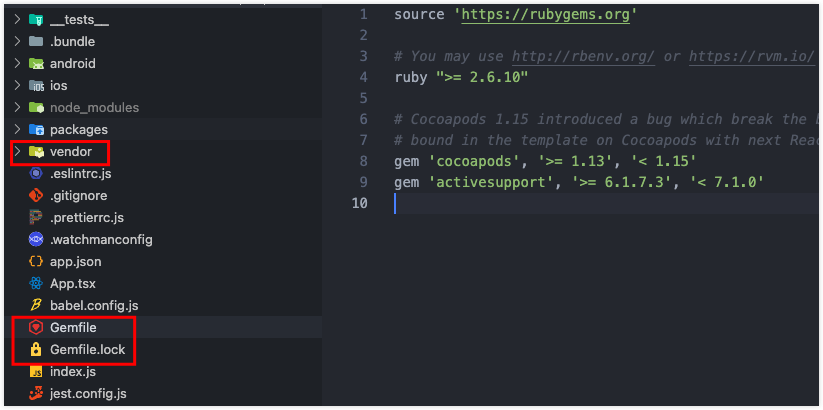
Gemfile 文件声明了依赖,依赖被安装在 vendor 文件中,Gemfile.lock 文件锁定了所依赖的版本。
bundle install 可安装依赖,bundle update 可更新依赖。
从 Gemfile 文件可以看到,bundle install 会安装 cocoapods,那么如何运行 pod 命令呢?
cd ios
bundle exec pod install
通过 Bundler 可以让团队成员都使用同一个 cocoapods 版本
Cocoapods
或者我们还需要一个额外的 cocoapods,毕竟不是所有项目都使用了 Bundler。
brew install cocoapods
Java
安装 Java 开发工具包
brew install --cask zulu@11
编辑 ~/.zshrc 文件,设置 JAVA_HOME
# vim ~/.zshrc 或 open -e ~/.zshrc
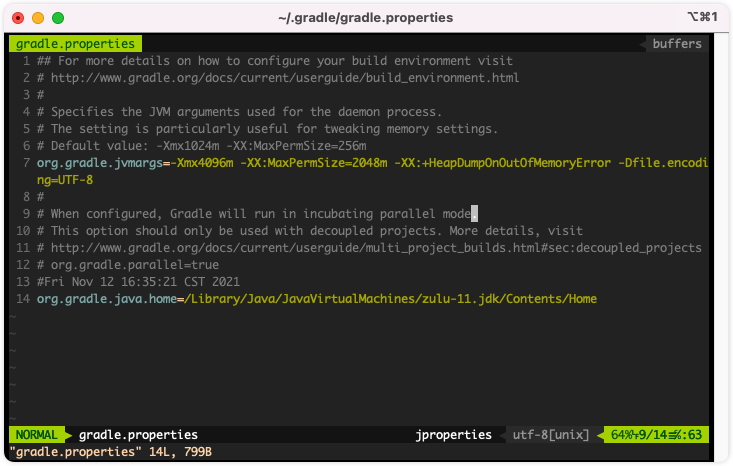
export JAVA_HOME='/Library/Java/JavaVirtualMachines/zulu-11.jdk/Contents/Home'
可以设置 gradle 和 Android Studio 使用同样的 JDK,如下
Android Studio
brew install --cask android-studio
也可以到官网下载
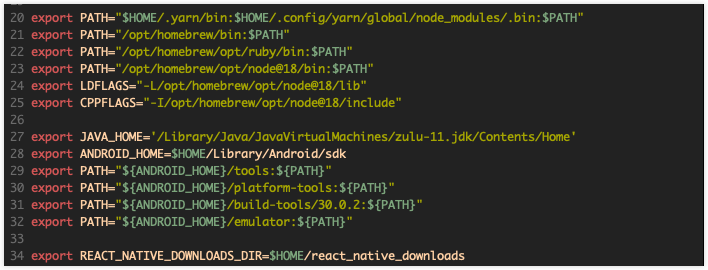
编辑 ~/.zshrc 文件,设置 Android 相关环境变量
# vim ~/.zshrc 或 open -e ~/.zshrc
export ANDROID_HOME=$HOME/Library/Android/sdk
export PATH="${ANDROID_HOME}/tools:${PATH}"
export PATH="${ANDROID_HOME}/platform-tools:${PATH}"
Visual Studio Code
我们推荐使用 VS Code 来作为前端代码的编辑器。
安装完成后打开 VS Code。
同时按下 ⇧ + ⌘ + P,安装 code command shell
安装主题 Atom One Dark (推荐)
安装主题 Material Icon Theme
安装插件 ESLint
安装插件 Prettier - Code formatter
安装插件 GitLens
Google Chrome 浏览器
使用 Homebrew 安装 Google Chrome:
brew install --cask google-chrome
iTerm2 (可选)
brew install --cask iterm2
快捷命令
command + f                 查找
command + d                 垂直分屏
command + shift + d         水平分屏
command + shift + enter     放大当前分屏至窗口
command + [ 或 command + ]  切换分屏
command + ;                 查看历史命令
command + shift + h         查看剪贴板历史

Control + u          清除当前行
Control + l          清屏
Control + a          到行首
Control + e          到行尾
Control + f/b        前进后退
Control + p          上一条命令
Control + r          搜索命令历史
oh-my-zsh (可选)
sh -c \
  "$(curl -fsSL https://raw.github.com/robbyrussell/oh-my-zsh/master/tools/install.sh)"
安装插件 zsh-syntax-highlighting
git clone https://github.com/zsh-users/zsh-syntax-highlighting.git \
  ~/.oh-my-zsh/custom/plugins/zsh-syntax-highlighting
安装插件 zsh-autosuggestions
git clone https://github.com/zsh-users/zsh-autosuggestions \
  ~/.oh-my-zsh/custom/plugins/zsh-autosuggestions
修改 ~/.zshrc
plugins=(git zsh-syntax-highlighting zsh-autosuggestions)
source $ZSH/oh-my-zsh.sh